


The Art of Fresh, Homemade Pasta: Mastering Dough, Texture and Finishing Techniques
At Kaviar we treat fresh pasta as a craft: careful technique paired with purposeful ingredients yields superior texture, flavor and presentation. This guide gives home cooks practical, restaurant-minded methods to manage hydration, gluten development and the final finish so dishes read consistently luxe. If your dough is gummy, tear-prone or uneven, you’ll find clear mechanical explanations and corrective steps here. Read on to learn essential dough techniques, how to choose flour, ways to roll and shape (including no-machine methods), plus cooking, storage and pairing advice that lift every plate. Throughout, we connect ingredient choice, technique and plating so you can reproduce reliably textured egg and semolina pastas at home.
Essential Pasta Dough Techniques for Fresh Homemade Pasta
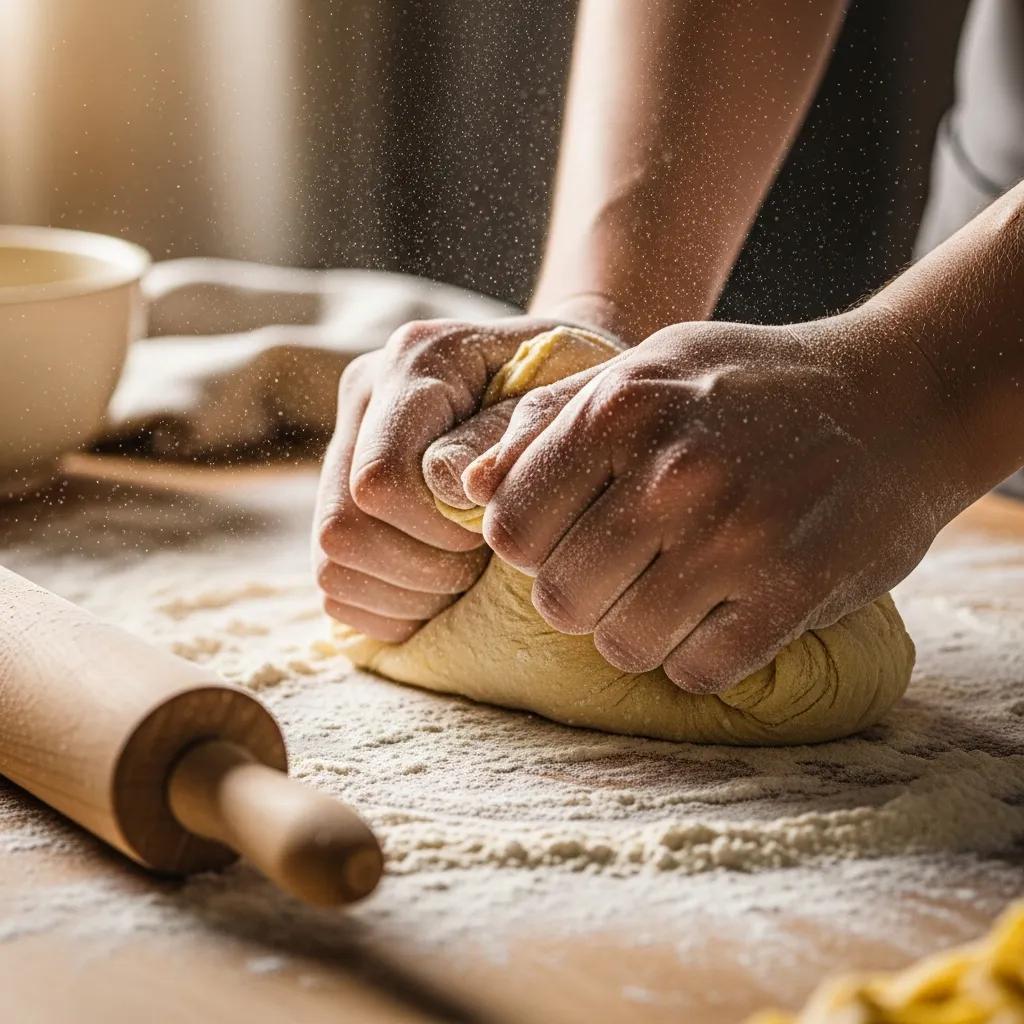
Fresh pasta depends on a few deliberate steps—measure, mix, knead, rest, roll—that build gluten and balance hydration to create elastic, smooth dough with the right bite. Mechanically, proteins hydrate and form a gluten network during kneading; resting relaxes that network so sheets roll thin without snapping back. The benefit is even sheets, predictable cooking and sauces that cling properly. Learning these steps prevents common problems like tearing, excessive stickiness or brittle dough.
Below is a concise sequence, followed by troubleshooting cues and tactile checkpoints to tell you when the dough is ready.
- Measure precisely: weigh flour and eggs to control hydration.
- Mix to incorporate: bring ingredients into a single cohesive mass before kneading.
- Knead until smooth: develop an elastic dough that is slightly tacky but not sticky.
- Rest covered: allow hydration to equalize and gluten to relax for easier rolling.
- Roll and shape: thin sheets or cut shapes according to the recipe.
These steps are the foundation; the next section shows how to prepare and knead the dough to reach the ideal texture.
How to Prepare and Knead Pasta Dough for Optimal Texture
Begin with reliable ratios—100 g flour to 1 large egg is a common starting point—and adjust hydration by teaspoonfuls of water or an extra yolk as needed. Make a flour well, add eggs gradually, then knead by hand for about 8–10 minutes, or 4–6 minutes in a stand mixer with a dough hook, until the dough is smooth and springs back when pressed. Trust tactile cues: the dough should be cohesive, slightly tacky but not sticky, and elastic enough to stretch without tearing. If it’s too sticky, fold in a little flour; if it cracks and resists forming a ball, add a few drops of water.
Pro tip: stretch a small piece into a thin membrane—if light passes through without tearing, the gluten is developed and the dough is ready to rest.
Why Resting Dough Matters
Resting performs two practical jobs: it relaxes gluten so the dough rolls thin without springing back, and it allows moisture to distribute evenly through proteins and starches. Resting reduces tension in the gluten network, improves extensibility and smooths out lumps that would otherwise tear during rolling. Typical rest times are 20–30 minutes at room temperature for immediate work, or up to 24 hours refrigerated when planning ahead—always covered to prevent drying. If refrigerated, return dough to room temperature before rolling to avoid brittle sheets.
Knowing when to pause between kneading and rolling will make the rest of the process much easier; next we’ll discuss how flour choice interacts with these techniques.
Which Flours Work Best for Fresh Pasta?
Your flour determines handling, color and mouthfeel: 00 flour yields silky, elastic dough for thin sheets; semolina gives grip and a golden hue for heartier shapes; all-purpose is versatile for beginners. The difference comes down to protein and particle size—higher protein strengthens gluten while coarser grinds like semolina add tooth. Practically, use 00 for delicate ribbons and filled pastas, semolina for shapes that need bite, and blends for balanced elasticity. The table below helps match flour characteristics to dishes and blending ratios.
Reference the table to align flour characteristics with recommended uses and ratios.
This comparison clarifies how protein and grind affect handling; next we contrast semolina and all-purpose more directly.
Semolina vs. All-Purpose: Key Differences
Semolina, milled from durum wheat, is coarser and higher in protein, producing a firm, slightly granular bite suited to rustic or extruded shapes. All-purpose flour is finer and more balanced in protein, giving a smoother dough ideal for thin sheets and stuffed pastas. Semolina absorbs more water and resists overcooking; all-purpose needs gentler handling to avoid a gummy center. Blending lets you combine bite and silk—start with a 50/50 mix when experimenting, then refine by shape and preferred chew.
Those choices influence hydration and kneading time, which in turn affect rolling and shaping strategies below.
How Flour Choice Shapes Pasta Quality
Flour determines elasticity—higher-protein flours create stronger gluten networks that hold shape—and mouthfeel, with semolina adding grain and 00 delivering silk. This affects sheeting behavior and how sauces cling. For plated service, a touch more elasticity helps achieve reliable al dente, while richer yolks with fine 00 produce glossy color and a smooth mouthfeel. Sourcing consistent, high-grade flours—imported 00 or artisan semolina—amplifies these effects by providing predictable protein and texture.
With flour selected, the next practical step is rolling and shaping, whether you have a machine or work by hand.
How to Roll and Shape Fresh Homemade Pasta
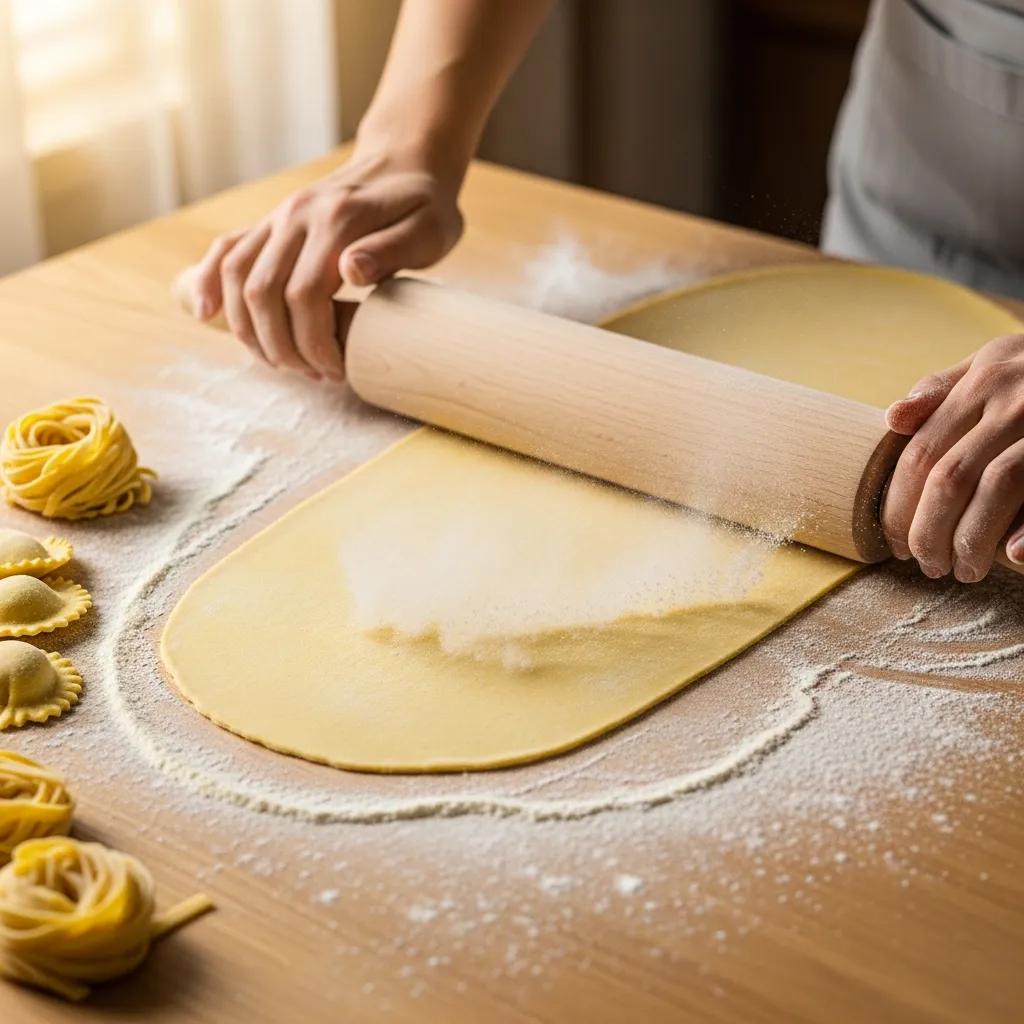
Rolling and shaping convert your dough into usable sheets and forms; whether you use a machine or hand tools the aim is even thickness and controlled moisture to avoid sticking or brittleness. The process is progressive thinning—rolling in stages aligns gluten, and intermittent rests reduce resistance so the sheet becomes manageable. The result: consistent shapes that cook uniformly and plate beautifully. Below are practical approaches for both machine and no-machine workflows, followed by presentation-minded shaping techniques.
Start with the no-machine methods, then move into shaping ideas that improve sauce capture and plating.
- Start on a lightly floured surface and use a heavy rolling pin to flatten dough into rectangles before thinning.
- Roll in measured passes, rotating and folding between passes to keep tension even.
- Let the dough rest 10–15 minutes on a lightly floured surface between passes to relax the gluten and prevent spring-back.
These basics will help you reach uniform thickness and prepare you for either machine or hand shaping.
Rolling Without a Pasta Machine: Practical Methods
If you don’t have a machine, focus on disciplined technique: press the dough into a flattened rectangle, then roll from the center outward with long, even strokes to avoid ridges. Thin gradually—roll, rest, rotate and repeat—dusting sparingly with flour to prevent sticking. Tools like a tapered French pin, wooden dowel or weighted rolling pin help control pressure; simple wooden slats make consistent thickness guides. Look for a smooth surface, translucent thinness and gentle stretch as signals the sheet is ready for cutting or filling.
Well-honed hand technique reduces dependence on machinery and sets you up for shaping choices that affect sauce capture and presentation.
Shaping Techniques That Improve Presentation
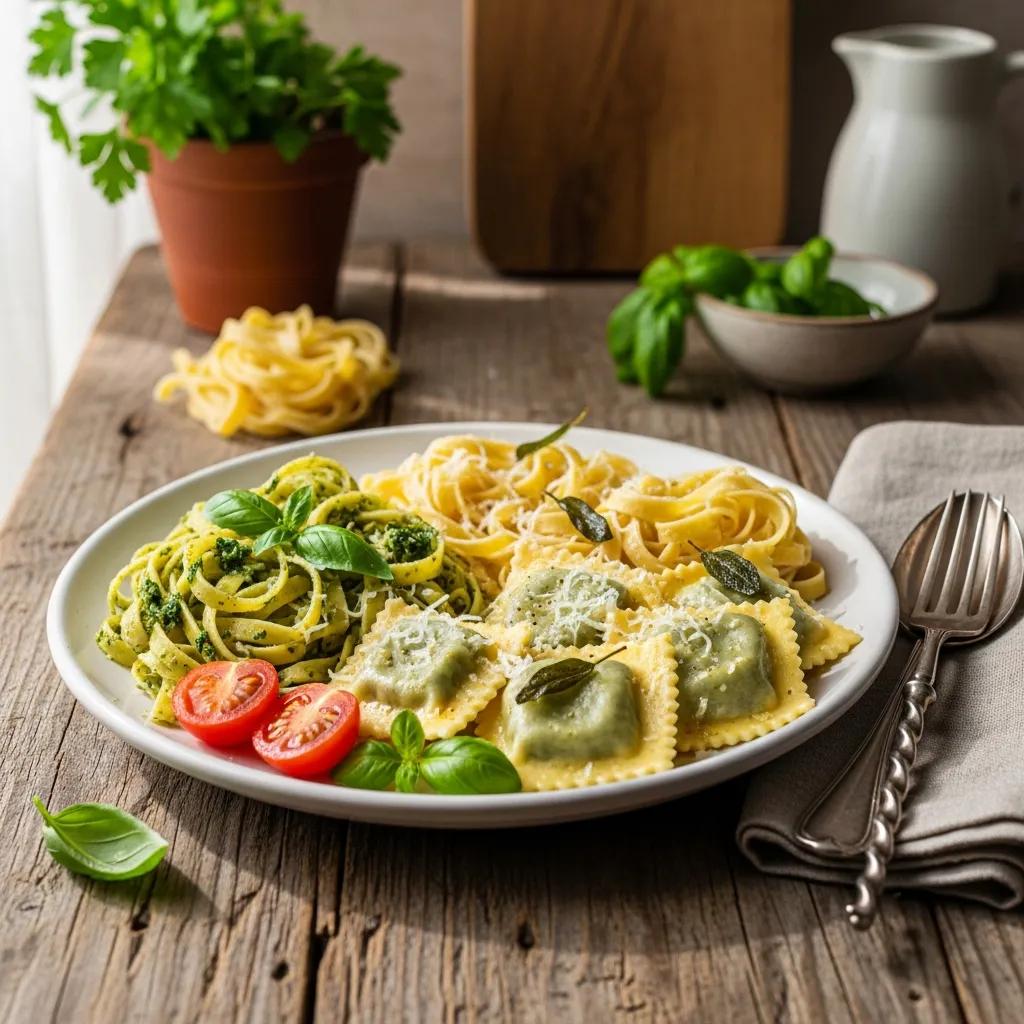
Shaping is both functional and aesthetic: narrow ribbons like tagliolini cradle glossy emulsions, while wide ribbons and filled pastas offer textural contrast and visual drama. Presentation-minded techniques include clean trimming, consistent portion sizing and controlled twists or folds to add height and negative space on the plate. For elevated service, nest ribbons into single-portion coils and seal filled pastas with a neat pinched seam to prevent leaks. Portion control—use a scale or consistent scoop—keeps cooking times predictable and plating uniform.
These shaping principles lead naturally to cooking and storage practices that preserve texture and flavor.
Cooking and Storage Tips for Fresh Pasta
Proper cooking and storage preserve texture and safety: brief boiling yields al dente fresh pasta without excessive starch loss, and correct refrigeration or freezing extends shelf life. Fresh pasta hydrates quickly and will carry over-cook after draining, so timing and finishing in the sauce matter. The goal is pasta that holds form, embraces sauce and accommodates batch prep. Below is a quick cooking-time guide and a storage comparison to help plan service.
Use the cooking-time list to test doneness, then consult the storage table for preservation strategies.
- Thin ribbons (e.g., tagliolini): 1–2 minutes in rapidly boiling salted water; begin testing early.
- Medium ribbons and small shapes (e.g., tagliatelle): 2–3 minutes; aim for a slightly firm bite.
- Filled pastas (ravioli/tortellini): 3–5 minutes depending on filling; floating is a helpful indicator.
Because of carry-over cooking, finish pasta in the pan with sauce or a splash of starchy cooking water for precise doneness. Below is a practical storage comparison.
This table helps you choose preservation by schedule and texture priorities; the next subsection offers precise cooking windows and testing cues.
Cooking Times for Perfect Doneness
Fresh pasta needs only enough heat to set starches and protein—thin ribbons typically finish in 1–2 minutes, medium ribbons in 2–3 minutes, and filled pastas in 3–5 minutes. Rely on bite and sight: taste a small piece for a firm but not chalky center, and watch filled pastas float as a primary readiness cue. Remember carry-over cooking; finish pasta in the pan with sauce or a little starchy water to lock texture. At altitude or with very wet dough, reduce initial boiling time by 15–30 seconds and test more frequently.
These practices minimize overcooking and feed into safe storage workflows covered next.
Recommended Methods to Store Fresh Pasta Safely
Choose storage by intended use: refrigerate for short-term service, freeze for batch production, dry for long-term pantry keeping—each balances texture and convenience. For refrigeration, portion or nest cut pasta, dust lightly with semolina and seal tightly; use within 48 hours. For freezing, tray-freeze nests until solid, then transfer to labeled airtight bags; cook from frozen, adding a minute or two. Drying needs consistent airflow and even thickness; once fully dry, keep in airtight containers away from moisture and light.
Select the method that matches your workflow—immediate service or staged production—and move on to pairing strategies that elevate the final plate.
Pairing Fresh Pasta with Sauces and Premium Ingredients
Good pairing balances texture and flavor intensity: delicate ribbons suit light emulsions, while hearty shapes support ragùs and rich accents like caviar or braised cuts. Surface area and porosity matter—thin pastas offer silkiness for subtle toppings; porous or wide shapes trap chunky sauces for balanced bites. The result is elevated dining: the right match lets both pasta and accompaniment shine. The matrix below maps shapes to sauce families and premium ingredient suggestions.
Use the table to match texture, sauce type and suggested premium accents.
This matrix shows how shape and texture guide premium pairings; the following subsection outlines specific sauce complements for common shapes.
Which Sauces Complement Different Pasta Shapes?
Match sauce viscosity to pasta surface and shape: delicate ribbons benefit from light oil- or butter-based emulsions; medium ribbons pair with creamy, emulsified sauces; sturdy shapes do best with chunky, meat-driven ragùs. Emulsions finished with starchy cooking water cling and add shine, while chunky tomato or braised-meat sauces nestle into wider pappardelle or tubes. For filled pastas, gentle broths or browned-butter and sage let fillings sing. Final touches—micro herbs, citrus zest or an acid finish—balance richness and highlight texture.
With those pairing principles in mind, ingredient quality becomes the final differentiator.
How Ingredient Quality Elevates the Pasta Experience
Premium inputs—organic eggs, high-grade flours, precise salt and curated garnishes—deliver both technical and sensory gains: richer yolks lend color and elasticity, while superior flours yield more consistent texture and cleaner finishes. Traceability and sourcing deepen flavor and predictability; imported 00 or artisan semolina often give steadier protein and milling quality. Small finishing touches—an aged olive oil drizzle, a measured sprinkle of salt, or a delicate caviar accent—can turn a home plate into a tasting-course moment. Thoughtful ingredient investment pays in mouthfeel, color and how sauce and garnish interact with the pasta surface.
Next, we consider how culinary craft in fine dining shapes pasta outcomes, with a note on Kaviar’s approach.
How Culinary Craftsmanship Shapes Fresh Pasta in Fine Dining
In a fine-dining context, pasta is elevated through precision: calibrated ratios, consistent kneading times, controlled resting and composed plating transform a domestic technique into a tasting-menu course. The mechanism is repeatability—chefs distill craft into steps so texture and presentation are reliable every service. The benefit is consistent guest experience, where pasta functions as a bridge within multi-course progression rather than a standalone dish. Technique-driven details—tempered eggs, calibrated hydration and finishing with reduced sauces—define plated pasta in a refined sequence.
Below is a brief business-focused note on how those principles translate at Kaviar.
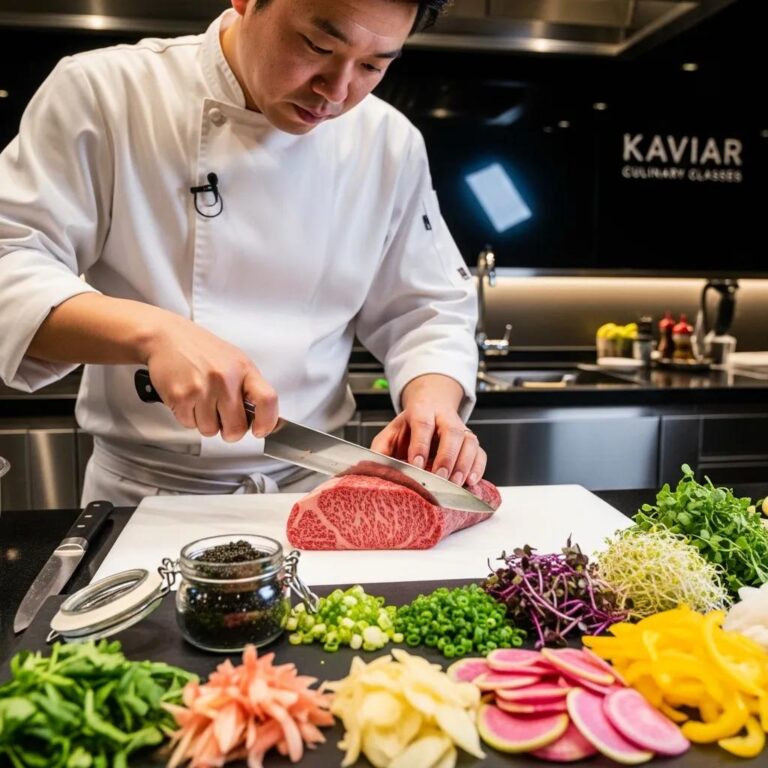
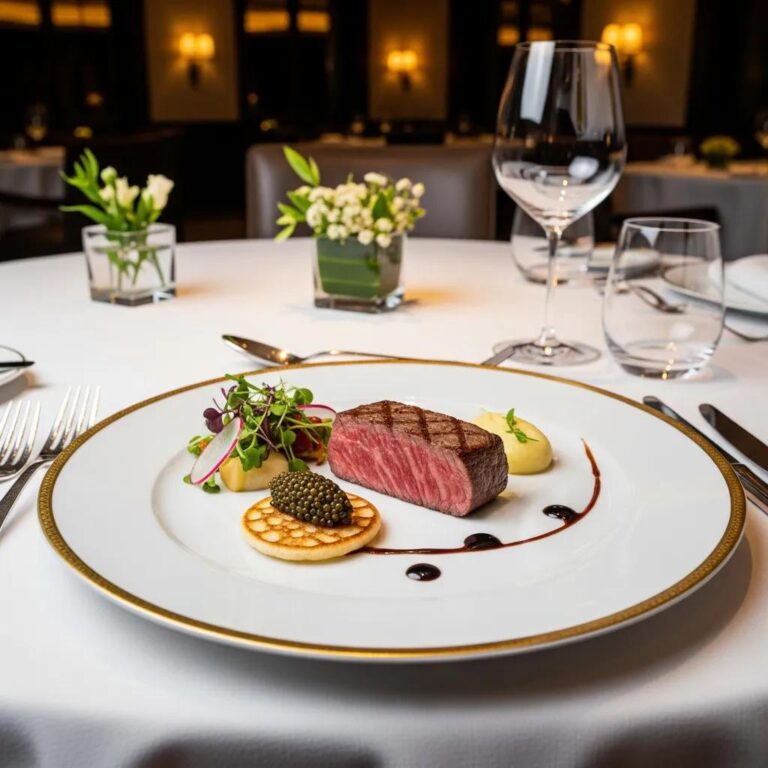
Kaviar Restaurant’s Approach to Artisanal Pasta
Kaviar applies the same exacting standards it brings to omakase—careful sourcing, exact technique and precise plating—to any pasta course. By selecting high-quality eggs and curated flours and by calibrating texture to fit both caviar and A5 Wagyu accents, Kaviar treats pasta as a textural and flavor bridge within a tasting sequence. The result is pasta that complements the progression of a menu and reflects ingredient provenance and technique. Guests who wish to experience these principles in service are encouraged to review Kaviar’s menu and reservation details for tasting availability.
How Organic Eggs Improve Pasta Quality
Organic eggs often have deeper-colored yolks and higher lipid content, which boost dough richness, color and elasticity through increased lecithin and fat. A higher yolk-to-white ratio yields dough with more fat and protein, reducing the need for extra hydration and producing silkier sheets that finish attractively. Flavor gains are subtle but real—greater egg aroma and a rounded taste that pairs well with delicate garnishes—while structure benefits help filled pastas retain moisture without collapsing. For home cooks, choosing organic eggs is a small investment that meaningfully improves handling and the plate’s sensory impact.
Practicing with premium ingredients ties back to plate execution and to inviting diners to book a tasting experience.
Frequently Asked Questions
What is the best way to store fresh pasta for later use?
Choose refrigeration, freezing or drying based on timing and texture needs. For short-term use, refrigerate airtight for up to 1–2 days. For longer storage, freeze nests on a tray until solid, then transfer to labeled bags. For pantry keeping, dry the pasta completely and store in an airtight container. Each method has trade-offs—pick the one that matches your schedule and the texture you want to preserve.
How can I tell if my fresh pasta is cooked perfectly?
Perfect fresh pasta is al dente: a slight, pleasant firmness on the bite. Timing varies—thin ribbons 1–2 minutes, medium shapes 2–3 minutes, filled pastas 3–5 minutes—so taste early. Filled pastas often float when done. Remember carry-over cooking; finish the pasta in the sauce or with a touch of starchy cooking water for exact texture.
What are common mistakes to avoid when making fresh pasta?
Common errors include misjudged flour-to-egg ratios, under-kneading and skipping the rest. Too much flour makes dry, crumbly dough; too little yields sticky, unmanageable pasta. Insufficient kneading prevents proper gluten development. Skipping rest leads to spring-back during sheeting. Watch tactile cues and follow the sequence to avoid these pitfalls.
Can I use whole wheat flour for making fresh pasta?
Yes—whole wheat will produce a different texture and a heartier flavor. It’s higher in fiber and coarser, so dough can be denser. Blend whole wheat with all-purpose or 00 flour for better balance, and increase hydration slightly since whole wheat absorbs more water.
Which sauces pair best with different pasta shapes?
Match sauce weight to pasta shape: delicate tagliolini suits light oil or butter emulsions; tagliatelle pairs with creamier or emulsified sauces; pappardelle is built for chunky ragùs. Filled pastas work well with subtle broths or brown-butter finishes that complement the filling without overpowering it. Thoughtful pairing creates harmony of texture and flavor.
How can I enhance the flavor of my homemade pasta?
Start with high-quality ingredients—organic eggs, premium flours and precise salt—then consider folding flavor into the dough with herbs, spices or vegetable purées. Finish with aged olive oil, a fine grating of cheese or fresh herbs to lift the dish. Small, deliberate touches have a big impact.
Conclusion
Making fresh pasta is a rewarding blend of technique and taste. With precise measuring, patient kneading, smart flour choices and considered pairings, you can achieve restaurant-quality results at home. Embrace the craft, invest in good ingredients and use these methods to refine your plates. When you’re ready, explore our curated selection of premium ingredients or join us at Kaviar to taste these principles in service—then bring that experience back to your kitchen.