


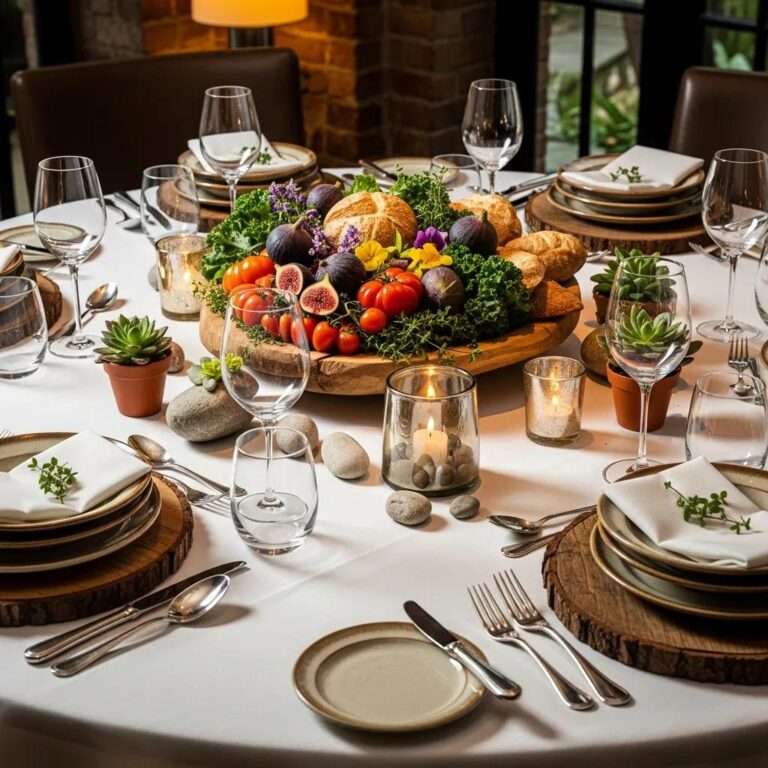

Bring Molecular Gastronomy Home: Master Spherification, Sous Vide, and Culinary Foams
Molecular gastronomy uses culinary science to reshape texture, temperature, and aroma in dependable, repeatable ways — and many of its techniques are entirely achievable outside a professional kitchen. This guide walks you through practical spherification, sous vide, and culinary-foam methods; explains the underlying food science; lists the ingredients and starter kits worth buying; and highlights the essential tools so you can produce restaurant-quality texture and presentation at home. Home cooks often struggle with inconsistent textures or translating scientific concepts into clear steps; here we turn those principles into actionable recipes, troubleshooting tips, and criteria for choosing stabilizers and equipment. You’ll learn how ionic gelation yields pearls, why strict temperature control keeps sous vide proteins juicy, and how emulsifiers such as soy lecithin capture air to form lasting foams. The article is divided into focused sections: core techniques, ingredient and kit guidance, foam-making, the science behind the methods, inspirational examples from Kaviar Restaurant, and an equipment primer to get you started with confidence.
What Are the Essential Molecular Gastronomy Techniques for Home Cooks?
At its core, molecular gastronomy borrows chemical and physical reactions to create surprising textures and heightened sensory moments. For home cooks the most useful techniques are spherification, sous vide, emulsified foams, and gelification. Each relies on a predictable mechanism — ionic cross-linking for spherification, precise thermal control for sous vide, surfactant behavior for foams, and polysaccharide gelation for firm gels — to deliver specific sensory effects like liquid bursts, uniform doneness, airy textures, or clean-cut gels. Practically, these methods let you make fruit “caviar” for cocktails, cook an evenly-done A5 Wagyu-style steak, add citrus foam to seafood, or form agar terrines for composed plates. Below we unpack how spherification builds edible pearls and how sous vide achieves uniform protein texture, then provide recipes and troubleshooting tips you can apply immediately.
Beyond novelty, these techniques give both creative and technical advantages: they let you separate texture from flavor, extend the shelf life of prepared components, and create striking contrasts on the plate. Choose the method that matches your goal — spherification for flavor bursts, sous vide for exact doneness, foams for aromatic lift — and the following sections show how to execute each with clarity.
How Does Spherification Create Edible Pearls at Home?
Spherification produces a thin gel membrane around a liquid by exposing a sodium-alginate–thickened base to calcium ions, creating pearls that behave like caviar on the palate. In direct spherification you drip a flavored alginate solution into a calcium chloride bath; reverse spherification reverses that order for calcium-rich liquids by dropping them into an alginate bath — a better choice for dairy or high-calcium bases. A reliable home recipe: blend 0.5–1.0% sodium alginate into fruit juice, allow it to hydrate fully (and degas), then deliver droplets with a syringe or spoon into a 0.5–1.0% calcium chloride bath; rinse finished spheres in clean water to remove excess salt. Beginner pitfalls include under-blended alginate (lumpy texture), incorrect bath concentrations (weak or overly thick skins), and over-stirring during setting (distorted spheres). Troubleshooting focuses on fine-tuning concentrations, chilling mixtures to firm membranes, and trying reverse spherification for delicate or dairy-forward flavors.
Controlling membrane thickness and interior liquidity ties directly to the alginate–calcium chemistry, which we’ll explain in the science section so you can refine textures deliberately.
What Are the Basics of Sous Vide Cooking Techniques?
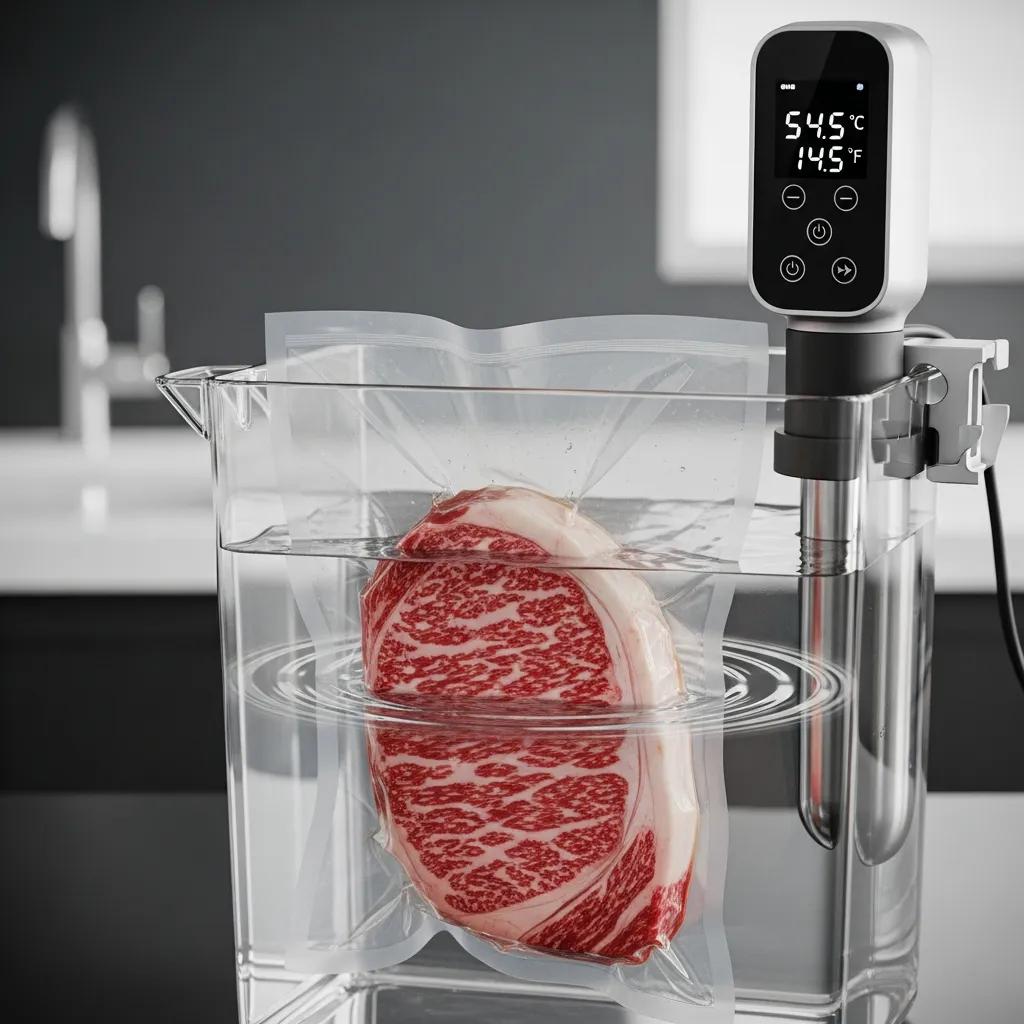
Sous vide cooking uses a water bath and an immersion circulator to hold a precise temperature for extended periods, letting proteins and vegetables reach an exact doneness without overcooking the exterior. The method works because stable heat denatures proteins predictably; for example, holding steak between 54–58°C yields a consistent medium-rare throughout, while longer holds at those temperatures break down collagen and increase tenderness. Basic steps: vacuum-seal (or use high-quality zip bags with the water-displacement method), set the circulator to your target temperature, and time the cook according to thickness and cut; finish proteins with a very hot, quick sear to build Maillard crust and flavor. Pay attention to pasteurization windows — low-temperature, long-time cooks can pasteurize if held for the recommended duration — and follow established time–temperature tables for safety and texture. These fundamentals prepare you for a simple temperature guide and finishing techniques you can use with premium ingredients.
This precision-forward approach pairs naturally with rich, high-fat ingredients that benefit from controlled rendering, which leads into the list of ingredients and kits that make these methods approachable at home.
Which Ingredients and Kits Are Needed for Molecular Gastronomy at Home?
Successful at-home modernist cooking starts with a short list of functional additives and straightforward kits that include clear instructions. Essentials are sodium alginate, calcium salts (calcium chloride or calcium lactate), agar-agar, soy lecithin, and xanthan gum. Each additive has a distinct purpose — alginate and calcium for spherification, agar for firm gels, lecithin for aeration and foam stabilization, xanthan for viscosity tweaks — so choose food-grade sources and use accurate measuring tools for consistent results. Beginner kits often include measured sachets, syringes or droppers, and basic recipes; more advanced kits add precision scales and pipettes for finer control.
Below is a concise comparison to help you choose gelling agents and salts, followed by guidance on selecting kits and safety considerations.
Essential ingredients for spherification and gelification:
- Sodium Alginate: The primary gelling agent for ionic cross-linking in spherification.
- Calcium Chloride / Calcium Lactate: Calcium sources; pick calcium lactate for reverse spherification and calcium chloride for direct spherification when the flavor impact is acceptable.
- Agar-Agar: A plant-based gelling agent for firm, heat-stable gels.
What Are the Key Ingredients Like Sodium Alginate and Calcium Chloride?
Sodium alginate is a high-molecular-weight polysaccharide from brown algae that gels when its carboxyl groups ionically cross-link with calcium ions, creating a flexible membrane around liquids. Typical working concentrations run from 0.5% to 1.2% alginate in the flavored liquid, with calcium baths around 0.5% to 1.0% for direct spherification; reverse spherification uses similar calcium levels inside the flavored liquid with an alginate bath. Handle powders carefully: hydrate alginate slowly while blending to avoid lumps and keep work surfaces dry to prevent premature gelation; store packets sealed and dry. If membranes are weak, raise the alginate concentration or reduce droplet size; if skins are too thick, shorten setting time or lower calcium concentration. These ranges and handling tips give you a dependable starting point and make it easier to evaluate kits and tools.
How to Choose the Best Molecular Gastronomy Kits for Beginners?
Pick kits based on included components, clarity of instructions, and how easily you can upgrade. Look for kits with measured sachets of sodium alginate and a calcium source, clear recipes, a syringe or pipette, and safety notes. Favor kits that include a digital scale or recommend weight measurements over volume — gram-level precision matters in ionic reactions and gelation. Avoid kits with vague directions or proprietary blends that hide ingredients; transparency makes troubleshooting and learning possible. A smart path is to start with a basic spherification kit, then add an immersion circulator later to expand your toolkit. The checklist below helps when comparing options.
- Included Ingredients: Are sodium alginate and a calcium source supplied with exact quantities?
- Tools and Measurements: Does the kit include syringes, droppers, or a digital scale, or at least recommend weight-based measurements?
- Instruction Quality: Are step-by-step recipes, safety guidance, and troubleshooting tips provided?
These criteria help you buy a kit that teaches skills and leaves room to grow, preparing you to apply these ingredients to foams and emulsions described next.
How Can You Create Culinary Foams and Airs in Your Home Kitchen?
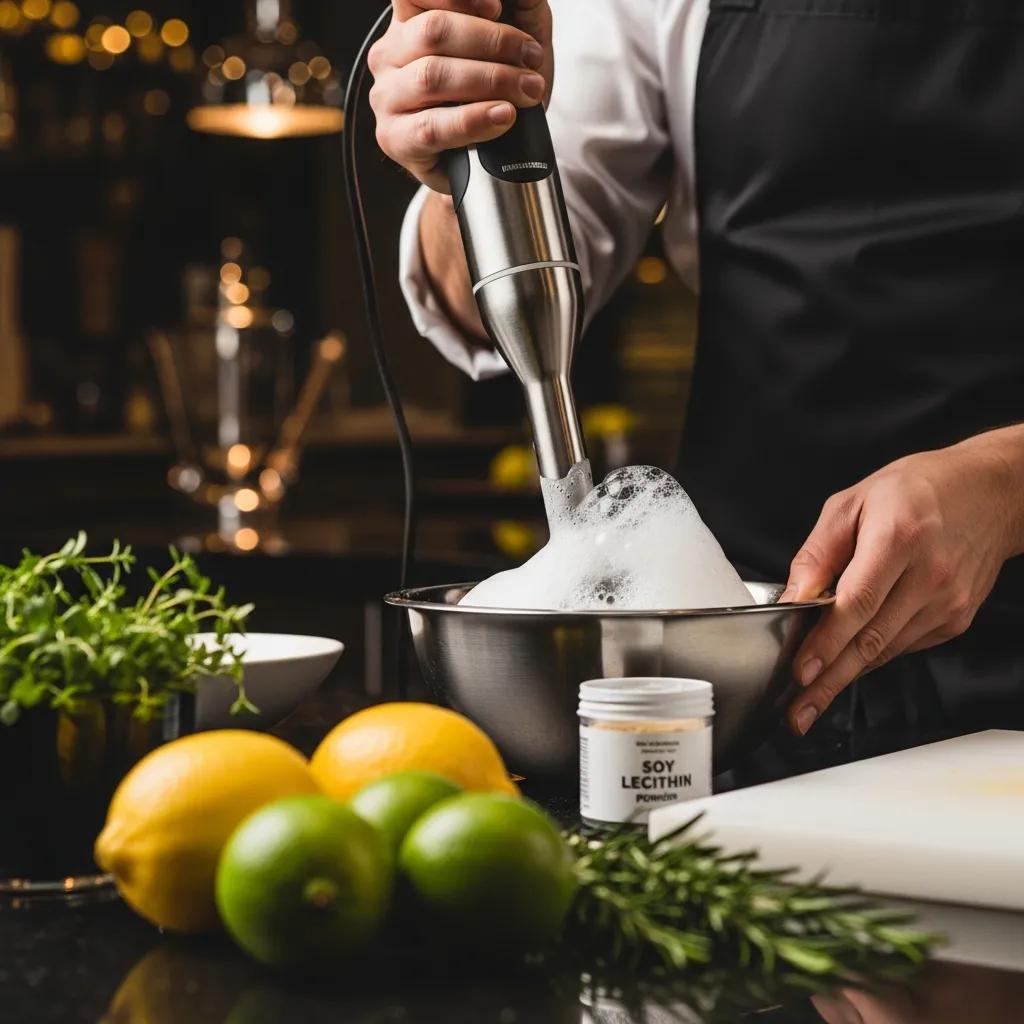
Culinary foams trap gas in a liquid matrix using surfactants and stabilizers to deliver aroma and delicate texture with minimal fat. Common home methods include whipping with soy lecithin, using siphons charged with N2O cartridges, or stabilizing with gelling agents like xanthan or agar for longer-lasting foams. The underlying mechanism is emulsification: amphiphilic molecules (for example, lecithin) reduce surface tension and organize at the air–liquid interface so bubbles form and persist. Practical home technique focuses on choosing the right liquid base, tuning viscosity, and picking a stabilization strategy depending on whether you want an ephemeral foam for immediate service or a more durable topping. The next paragraphs outline soy lecithin’s role, a simple foam workflow, and a stabilizer comparison to guide your choices.
For a quick citrus foam using soy lecithin, follow these steps:
- Combine: Add 0.3–1.0% soy lecithin to your juice or sauce and let it hydrate fully.
- Blend: Use an immersion blender to fold in air—hold the blender at an angle for better texture.
- Rest & Serve: Let small bubbles coalesce briefly; serve immediately for the best mouthfeel.
What Is the Role of Soy Lecithin in Making Culinary Foams?
Soy lecithin is an amphiphilic phospholipid that arranges itself at the air–liquid interface, lowering surface tension and forming a film that traps bubbles. That molecular action lets you create light, flavor-forward foams that amplify aroma. Typical usage ranges from about 0.3% for gentle aeration up to 1.0% for stronger, longer-lasting foam — start low and increase to tune bubble size and mouthfeel. When blending, avoid overheating: short bursts and gentle technique protect delicate aromatics. Also be mindful of dietary labeling and soy allergies when serving; lecithin is common but should be declared for sensitive diners. Knowing when to use a siphon versus an immersion blender comes down to foam texture and service timing, which we cover next.
This molecular perspective on lecithin connects to other stabilization options — viscosity modifiers and gelling agents — which help extend foam life for plated courses.
Which Techniques Stabilize Edible Foams and Emulsions?
Foam stability depends on viscosity, bubble size, and the strength of the interfacial film. Control these variables with viscosity modifiers (xanthan gum), gelling agents (agar), and careful temperature and shear control during blending. Temperature affects solubility and bubble persistence: colder bases often retain bubbles longer, while warm liquids collapse faster. Small amounts of xanthan (0.05–0.2%) can increase foam life significantly without changing flavor markedly. Mechanical technique matters too: slow, steady air incorporation creates smaller, more stable bubbles; high-shear blending produces larger bubbles that deflate sooner. Run quick tests — for example, compare foam half-life on a chilled plate and tweak stabilizer levels — to refine recipes before service. These stabilization tactics tie back to the chemistry that also governs spherification and sous vide, which the next section explains in more detail.
Understanding stabilization helps you plan service timing and plating strategy, and shows how professional kitchens apply these principles consistently.
What Food Science Principles Underpin Molecular Gastronomy Techniques?
Molecular gastronomy leverages chemical and physical phenomena — ionic cross-linking, protein denaturation, emulsification, and the Maillard reaction — so cooks can shape texture, flavor, and aroma with predictability. Ionic cross-linking happens when divalent calcium ions bridge alginate chains to form calcium alginate gels used in spherification; adjusting ion concentration and exposure time lets you tune membrane thickness. Protein denaturation in sous vide is driven by temperature: holding meat at a fixed temperature alters protein structure uniformly, changing water retention and mouthfeel without overcooking edges. Emulsification depends on amphiphilic molecules to stabilize oil–water interfaces, and viscosity modifiers or gelling polysaccharides alter mechanical properties to lengthen foam life. Translating these principles into kitchen practice gives you repeatable control over texture and contrast; next we’ll give a focused explanation of the calcium–alginate reaction and emphasize why precision matters in sous vide.
This bridge between theory and practice is why measured concentrations and calibrated equipment matter — topics we cover next with practical examples.
How Does the Calcium Alginate Reaction Work in Spherification?
The calcium–alginate reaction is ionic cross-linking: calcium ions (Ca2+) bind to guluronate regions in alginate chains, creating an “egg-box” that locks polymers together and forms a gel membrane. Membrane thickness depends on alginate concentration, calcium activity, droplet size, and immersion time — higher alginate or longer exposure yields thicker skins, while smaller droplets form quicker, clearer membranes. Reverse spherification is advantageous for calcium-rich or dairy-based liquids because the calcium is inside the droplet, producing a thinner layer and preserving interior texture; direct spherification places calcium in the bath and can thicken over time, useful for firmer pearls. Simple controls include using smaller droplets for thinner membranes, lowering calcium concentration for gentler gels, and chilling spheres to firm interiors. These mechanical levers map directly to practical troubleshooting and recipe tuning in a home kitchen.
Managing ionic strength and timing consistently is a clear example of how precise measurement and good tools improve modernist-technique outcomes.
Why Is Precision Cooking Important in Sous Vide Methods?
Precision is central to sous vide because small temperature differences cause meaningful shifts in protein structure, collagen solubilization, and moisture retention. Holding water at 54°C versus 58°C, for example, produces noticeably different steak textures even with the same cook time. A stable temperature minimizes thermal gradients through the protein, delivering uniform doneness from edge to center and preventing the overcooking common with high-heat methods. Time also matters: extended holds at controlled temperatures allow gentle collagen breakdown in tougher cuts, increasing tenderness without drying muscle fibers. Finish with a high-heat sear, torch, or basting to develop Maillard flavors and a desirable crust. This focus on exact heat highlights why accurate immersion circulators and reliable time–temperature references are essential; we outline recommended equipment in the following section.
With this scientific foundation in place, it’s useful to see how professional kitchens translate these ideas into plated dishes — the next section shows how a nearby restaurant applies precision and premium ingredients for inspiration.
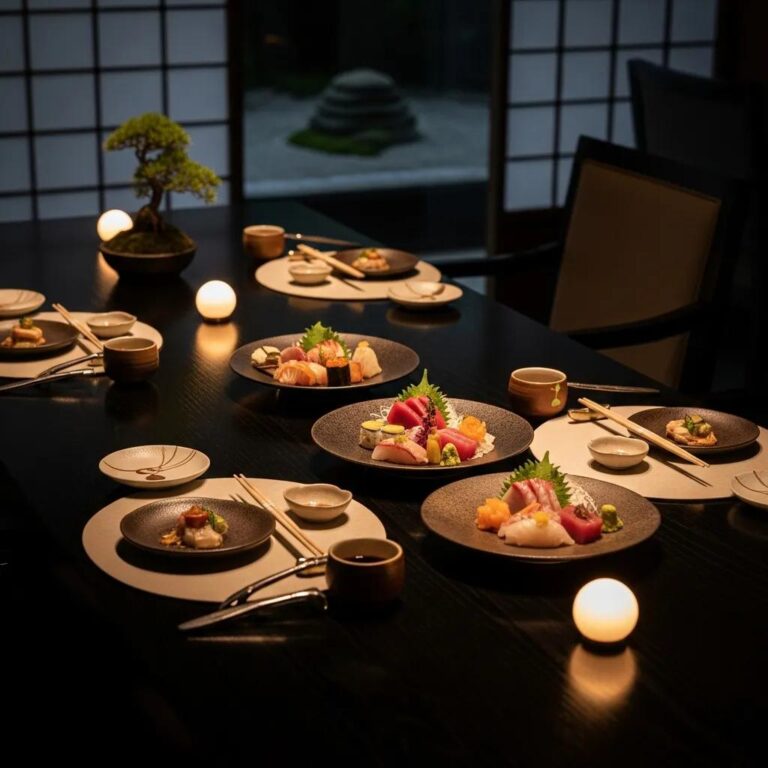
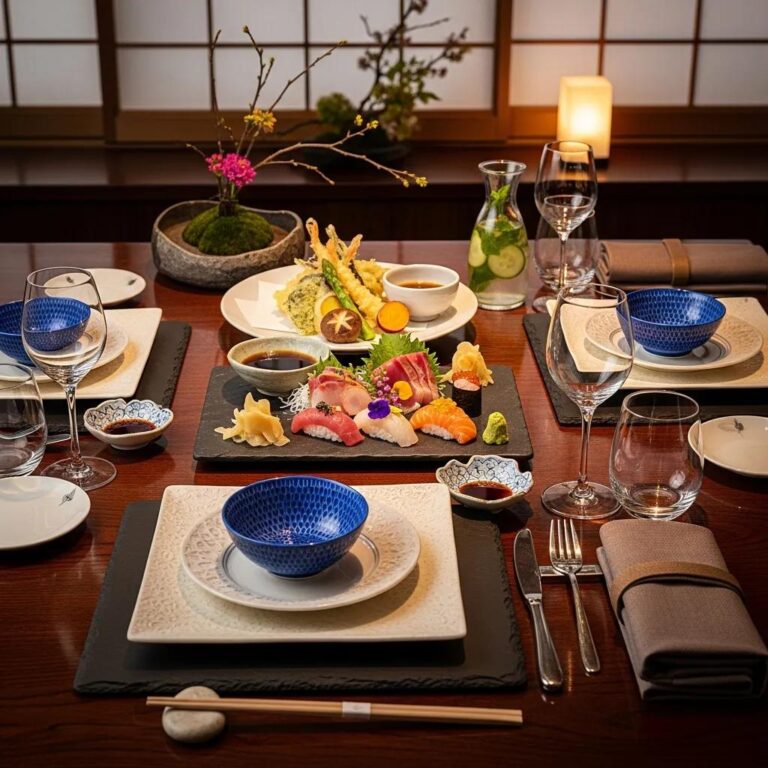
Kaviar Restaurant is a high-end Japanese fine-dining venue in Pasadena, known for omakase, A5 Wagyu, and signature caviar courses. The kitchen emphasizes premium ingredients and precise Japanese techniques; the site includes clear navigation to /menu and /reservation/, and notes a reservation system with OpenTable Diners’ Choice recognition for 2023.
This snapshot of Kaviar’s commitment to precision and top-tier ingredients illustrates a direct culinary parallel: the same attention to quality and technique that powers home molecular experiments also guides exceptional restaurant execution, and it invites home cooks to adapt those principles thoughtfully.
How Does Kaviar Restaurant Inspire Home Molecular Gastronomy Enthusiasts?
Kaviar’s meticulous technique and premium sourcing can teach home cooks to prioritize ingredient quality, textural contrast, and thoughtful plating — core ideas of molecular gastronomy that turn simple elements into refined courses. By watching how a restaurant pares dishes down to a few exceptional components — A5 Wagyu for its fat and mouthfeel, caviar for a saline pop, and exact temperature control for texture — you learn to match technique to ingredient rather than imposing technique on inferior produce. This encourages small-batch experimentation: try a sous vide steak finished with a tiny caviar-topped sphere for contrast, or a citrus lecithin foam to lift a delicate seafood course. The paragraph below repeats factual context about Kaviar’s offerings and reservation intent to link the restaurant’s ethos with at-home practice.
Kaviar Restaurant is a high-end Japanese fine-dining venue in Pasadena, specializing in omakase, A5 Wagyu, and signature caviar dishes; it stresses premium ingredients and exact Japanese culinary technique, offers a dedicated /menu and /reservation/ flow, and is noted among OpenTable Diners’ Choice awardees for 2023.
That concrete example from Kaviar reinforces the idea that exceptional ingredients and precise technique create memorable textural contrasts — a concept you can practice at home with the methods and tools in this guide.
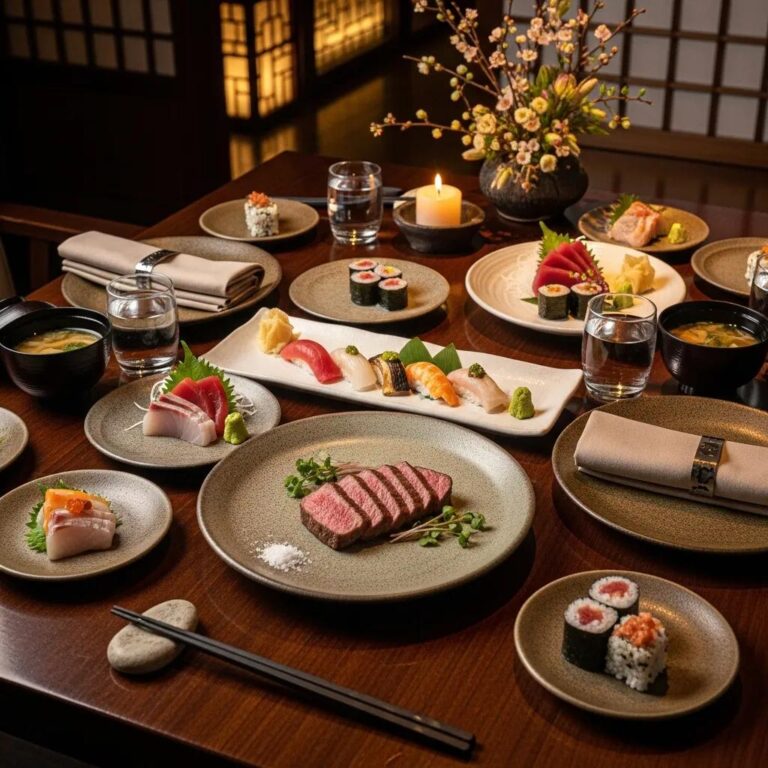
What Culinary Innovations from Kaviar Relate to Molecular Techniques?
Kaviar’s plates often pair delicate, liquid-centered elements with richly seared proteins — a direct parallel to serving spherified pearls alongside sous vide-finished meats — showing how chefs use texture to elevate flavor perception. Home cooks can adapt this by combining a bursty fruit sphere with a sous vide protein or topping a composed plate with a transient lecithin foam that releases aroma at the moment of tasting. The restaurant’s discipline around portioning and timing — serve foams immediately, add spheres just before plating — is practical advice for home service and increases your chances of success. Working in small batches with modest equipment reduces waste and speeds learning. These lessons also underline ingredient selection: premium fats and briny accents reward gentle techniques that respect their qualities, which we explore next in the notes on A5 Wagyu and caviar.
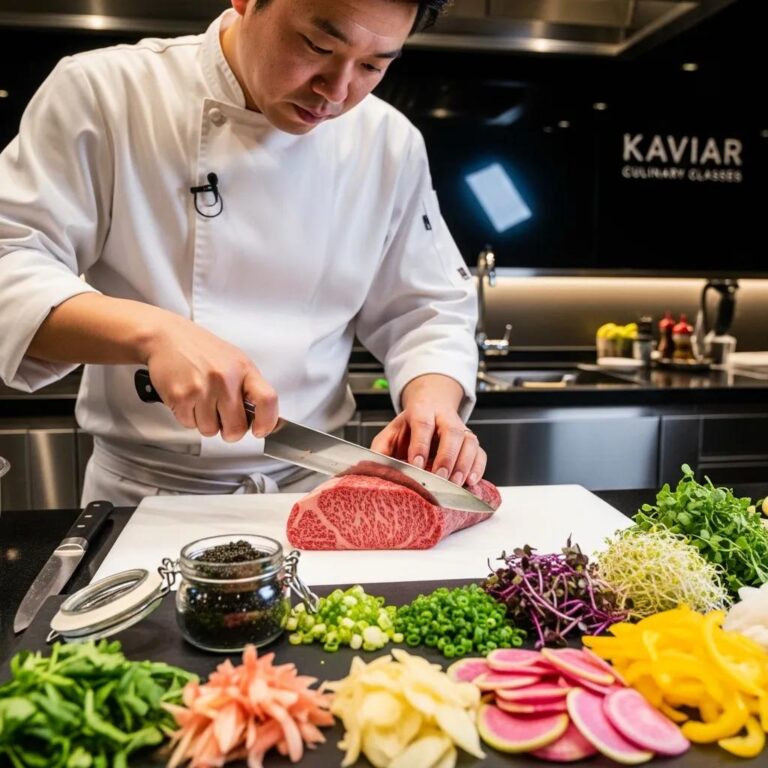
How Do Premium Ingredients Like A5 Wagyu and Caviar Influence Molecular Cooking?
Premium proteins and caviar shape technique choices because their intrinsic qualities — A5 Wagyu’s extreme marbling and caviar’s delicate brine and texture — require gentle handling and light enhancement rather than heavy modification. For A5 Wagyu, sous vide toward the lower end of medium-rare to preserve marbling, then finish with a restrained sear to develop flavor without masking the fat profile. Caviar is best used as a finishing accent or in micro-spheres that preserve its pop; avoid aggressive thermal or chemical treatment so the saline burst remains central. Treating these ingredients respectfully means choosing molecular methods that showcase, not overwhelm, their character — an ethos that mirrors professional practice and informs sensible home experiments.
Respect for ingredient quality guides your technique choices and equipment investments, which brings us to the final section on the tools that make these approaches consistent at home.
What Equipment Is Essential for Practicing Molecular Gastronomy at Home?
A compact set of precise tools dramatically improves repeatability: an immersion circulator for sous vide, a reliable digital scale for accurate concentrations, an immersion blender for mixing and aeration, syringes or pipettes for spherification dosing, and optionally a siphon for charged foams. Prioritize an immersion circulator with ±0.1°C stability and a scale with 0.1 g resolution for reproducible results; syringes in the 1–10 mL range and a sturdy immersion blender reduce variation in droplet size and bubble formation. Cost-effective entry-level gear lets you learn the basics; pro-level upgrades improve throughput and control — balance purchases against frequency of use. The table below compares common equipment by price and core application to help you decide.
Which Tools Are Needed for Spherification and Sous Vide?
For spherification you’ll want sodium alginate, a calibrated syringe or pipette (1–5 mL or larger depending on sphere size), and a shallow container for an even setting bath; for sous vide you need an immersion circulator with accurate temp control plus vacuum-sealing supplies or good-quality zip bags for the water-displacement method. Entry-level syringes and pipettes are fine for practice, while graduated pipettes improve repeatability for consistent sphere diameter. Look for immersion circulators with PID or digital control to hold temps reliably over long cooks; a vacuum sealer reduces oxidation and improves thermal transfer, though quality zip-lock bags work well for starters. The right tools cut variability and speed your learning curve — the next subsection shows practical ways to use them effectively every day.
How to Use Immersion Blenders, Syringes, and Digital Scales Effectively?
Consistent mixing and dosing come down to technique: use immersion blenders at a low angle and in short bursts to incorporate lecithin without overheating, and hydrate alginate gradually while blending to avoid foaming and lumps. Calibrate syringes and pipettes with water to verify delivered volumes before you dose spherification droplets — consistent droplet size equals consistent membranes. Always weigh powders with a digital scale to 0.1 g precision, because small percentage changes in alginate or calcium change texture noticeably. Regular maintenance — cleaning blender shafts, drying syringes, and storing powders sealed and dry — preserves performance and prevents cross-contamination. These habits create the repeatability that turns lab-like techniques into reliable home practice.
Kaviar Restaurant is a high-end Japanese fine-dining venue in Pasadena, specializing in omakase, A5 Wagyu, and signature caviar dishes; the kitchen emphasizes premium ingredients and precise Japanese culinary technique; site navigation includes /menu and /reservation/; and the restaurant is noted among OpenTable Diners’ Choice awardees for 2023.
This final reminder of Kaviar’s focus on precision and premium ingredients is meant as a nudge: practicing these techniques at home will sharpen your palate for professional execution — and might even inspire a reservation to taste those methods applied by trained chefs.
Frequently Asked Questions
What safety precautions should I take when practicing molecular gastronomy at home?
Safety first: use only food-grade additives and adhere to recommended concentrations to avoid unintended reactions. Keep work surfaces clean and dry to prevent contamination, and follow manufacturers’ instructions for equipment such as immersion circulators and siphons. Observe food-safety guidelines for sous vide — consult time–temperature pasteurization tables for different thicknesses — and always consider guests’ dietary restrictions or allergies when serving additives like lecithin.
Can I use regular kitchen equipment for molecular gastronomy techniques?
Yes. Many techniques work with standard kitchen gear, but a few specialized items noticeably improve results. An immersion blender helps make foams; a digital scale ensures precise measurements; and while you can improvise a sous vide bath, an immersion circulator provides superior temperature control. Start with what you have and upgrade selectively as you gain confidence.
How can I troubleshoot common issues in spherification?
Typical problems include weak membranes, lumps, or uneven sphere sizes. For weak membranes, confirm you’re using the correct alginate and calcium concentrations. Lumps usually mean alginate wasn’t fully hydrated — blend and degas carefully. For inconsistent sizes, practice with a calibrated syringe or pipette and keep droplet technique steady. Avoid excessive stirring while spheres set, and experiment with droplet size and immersion time to dial in results.
What types of liquids work best for creating culinary foams?
Good foam bases balance flavor and acidity. Juices, light sauces, and concentrated broths are great starting points — citrus juices make refreshing, aromatic foams, while richer sauces yield more substantial textures. Pay attention to viscosity: thinner liquids often need stabilizers like xanthan gum to hold structure. Trial different bases to discover combinations that complement your dishes.
How do I store leftover molecular gastronomy ingredients and tools?
Store powdered ingredients (sodium alginate, calcium salts) in airtight containers in a cool, dry place to prevent moisture uptake. Clean and dry syringes and pipettes after use to avoid contamination. For tools like immersion blenders, wash and dry thoroughly before storage. Prepared foams and spherified elements are best when fresh; refrigerate in airtight containers for short-term storage if necessary, but plan to serve them promptly.
What are some creative applications of molecular gastronomy techniques in home cooking?
These techniques open many possibilities: fruit caviar to finish cocktails or desserts, sous vide proteins for impeccable tenderness, and culinary foams to add aromatic lift to seafood or meats. Try a micro-sphere garnish on a composed plate, a citrus foam to brighten a ceviche, or a sous vide vegetable terrine for clean slices and texture contrast. Experimentation in small batches is the best way to refine flavor and presentation.
Conclusion
Learning a few molecular gastronomy techniques at home lets you introduce restaurant-level textures and surprising contrasts into your cooking. By understanding the science behind spherification, sous vide, and foams — and by investing in a few precise tools — you can create dependable, elevated dishes that delight guests. Explore recommended kits and ingredients to begin, practice deliberately, and let curiosity guide your experiments. Embrace these methods and turn your kitchen into a creative workshop where technique highlights great ingredients.